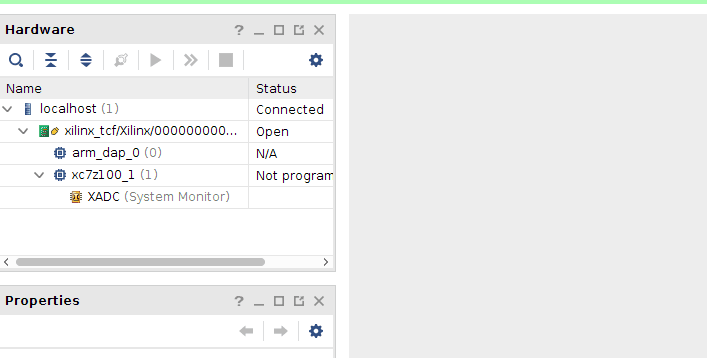
这几天搞的都要搞的奔溃了,新装的ubuntu虚拟机,vivado2017.4总是无法扫到设备,而真实的LINUX虚拟机又是可以的,重装了N遍,换了N台电脑后确认,确认应该不是安装的问题,最终在XILINX官网找到以下方法,贡献给大家。以下是我识别到后的情况
 没错,测试的是最新的MZ7100开发板。。。
DescriptionIf the Xilinx USB/Digilent cable driver was not installed when installing Vivado Design Suite or if the Xilinx USB/Digilent cable driver is disabled, is it possible to reinstall the driver without a full reinstallation of Vivado?
SolutionYes, the driver installers are always supplied with the Vivado installation and are located in <Vivado installation dir>\data\xicom\cable_drivers\ In this directory, there are subdirectories for each OS (nt/nt64) or (lin/lin64)
For Windows there is an install_drivers_wrapper batch file which needs to be called with the following arguments:
in 64-bit Windows: cd <Vivado install path>\data\xicom\cable_drivers\nt64
install_drivers_wrapper.bat <Vivado install path>\data\xicom\cable_drivers\nt64 C<Vivado install path>\install.log <Vivado install path>\
in 32-bit Windows: cd <Vivado install path>\data\xicom\cable_drivers\nt
install_drivers_wrapper.bat <Vivado install path>\data\xicom\cable_drivers\nt C<Vivado install path>\install.log <Vivado install path>\
For Linux you need to follow the procedure outlined in the readme.txt (<Vivado installation dir>/data/xicom/cable_drivers/lin64/install_script/install_drivers/readme.txt): 1) Disconnect all Xilinx USB cables from the host computer.
2) Open a shell or terminal console.
3) Extract the driver script and its support files to a local drive of the machine where the cable will be used by typing:
tar xzvf install_drivers.tar.gzThe extraction creates a directory named install_drivers in the current directory.
4) Navigate to the install_drivers directory by typing:
cd install_drivers5) Run the script by typing:./install_drivers6) When the installation is complete, reconnect the cable.
7) Change permissions on the USB / PC4 driver by typing:
chmod 666 /dev/windrvr6
Note: By default, access to windrvr6 is restricted to root only.
This step grants group and user access to the driver. However, if you reboot your system, access to the driver will revert back to root-only and you will have to repeat step #7 (you do not have to rerun the installation script).
If the STATUS indicator on the cable illuminates, then the driver installation completed successfully.
|